


Agency Darlings x Copper CRM are teaming up to change the way creative agencies approach business development.
Agency founders are exceptional at their expertise, but struggle with lead generation… and more importantly, lead nurturing (and lead conversion). You’ve probably started to build your agency on referrals but eventually, you’ll outgrow those referrals or use them up.
This playbook is our solution! It’s a strategic approach that turns relationship-building from an overwhelming task into a natural, repeatable process. By combining Agency Darlings' deep expertise in business development with Copper's powerful CRM capabilities, we've created this playbook to help you feel empowered and in control.
Here’s what you can expect:
- Why lead generation is so important for the growth of your agency
- How and where to find leads for your agency
- How to track and nurture leads
- How to prioritize and organize your best-fit leads
The truth
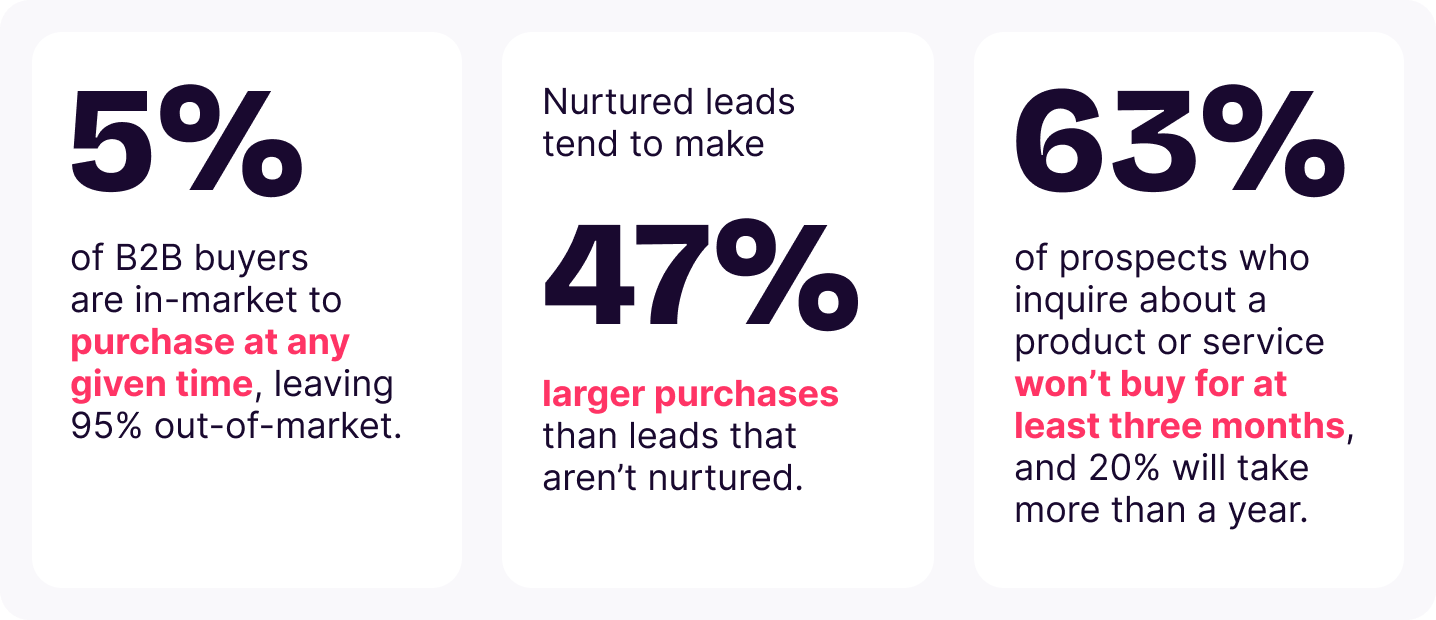
- According to the Ehrenberg-Bass Institute, about 5% of B2B buyers are in-market to purchase at any given time, leaving 95% out-of-market.
- Nurtured leads tend to make 47% larger purchases than leads that aren’t nurtured.
- 63% of prospects who inquire about a product or service won’t buy for at least three months, and 20% will take more than a year.
Building a strong brand and staying visible isn’t just a nice-to-have—it’s the backbone of effective lead nurturing and lead generation. It’s truly the key to being the first choice when buyers are ready to make a move. By keeping your brand in front of your audience, you ensure that when the majority shifts into buying mode, your name is the one they remember.
Why this matters
At the end of the day, sustainable agency growth is about patience, consistency, and strategic relationship building.
These stats show us that:
- Ice cold sales pitches (in any form) are almost guaranteed to fail
- Trust and credibility take time to develop
- Consistent, value-driven communication is key
- Success comes from viewing prospects as potential long-term partners, not quick transactions
By implementing our playbook, you can turn what seems like a daunting process into one that’s enjoyable, meaningful, and even fun!


